After learning a bit of anatomy, I decided to challenge myself during my freetime to reproduce the best I could my favourite sculpture of Bernini. I just wanted to do the sculpt and 3D print it to have a classical sculpture at home.
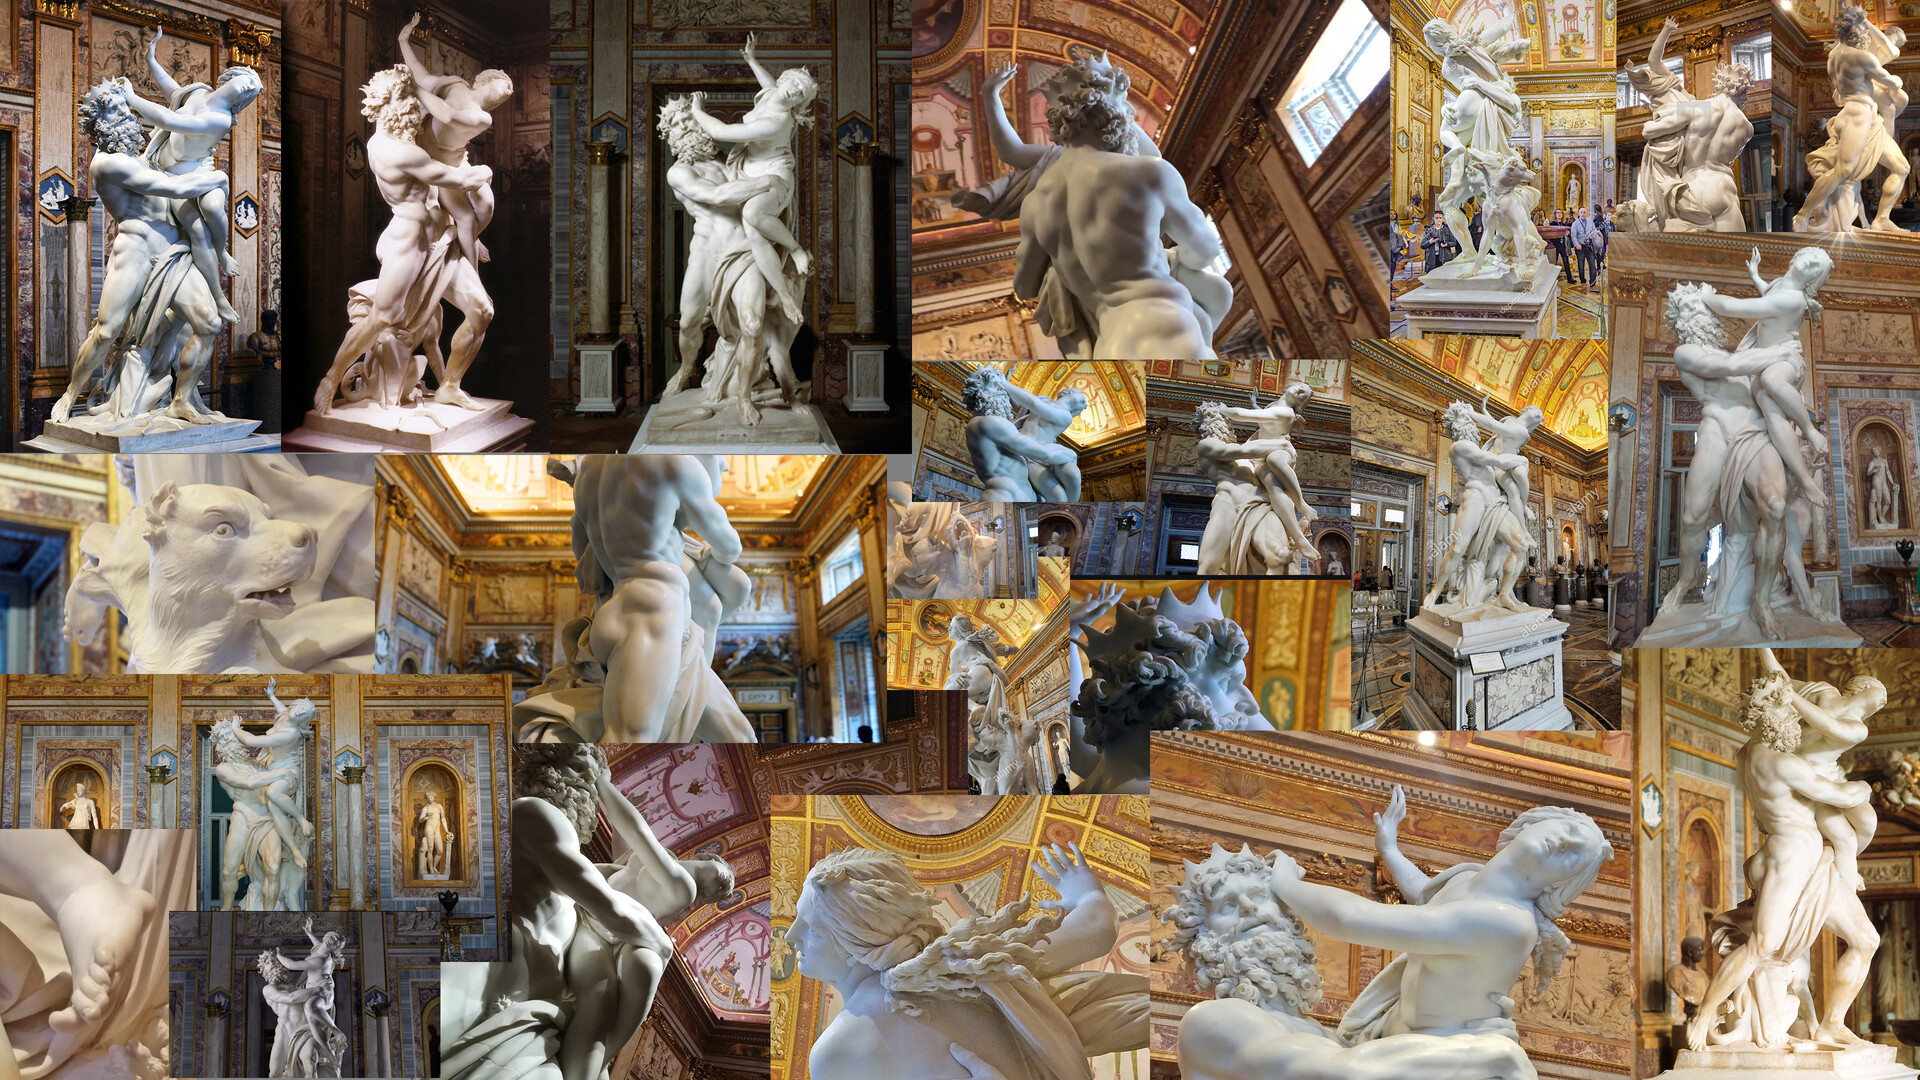
- I started to gather a lot of references, this is just few of them:
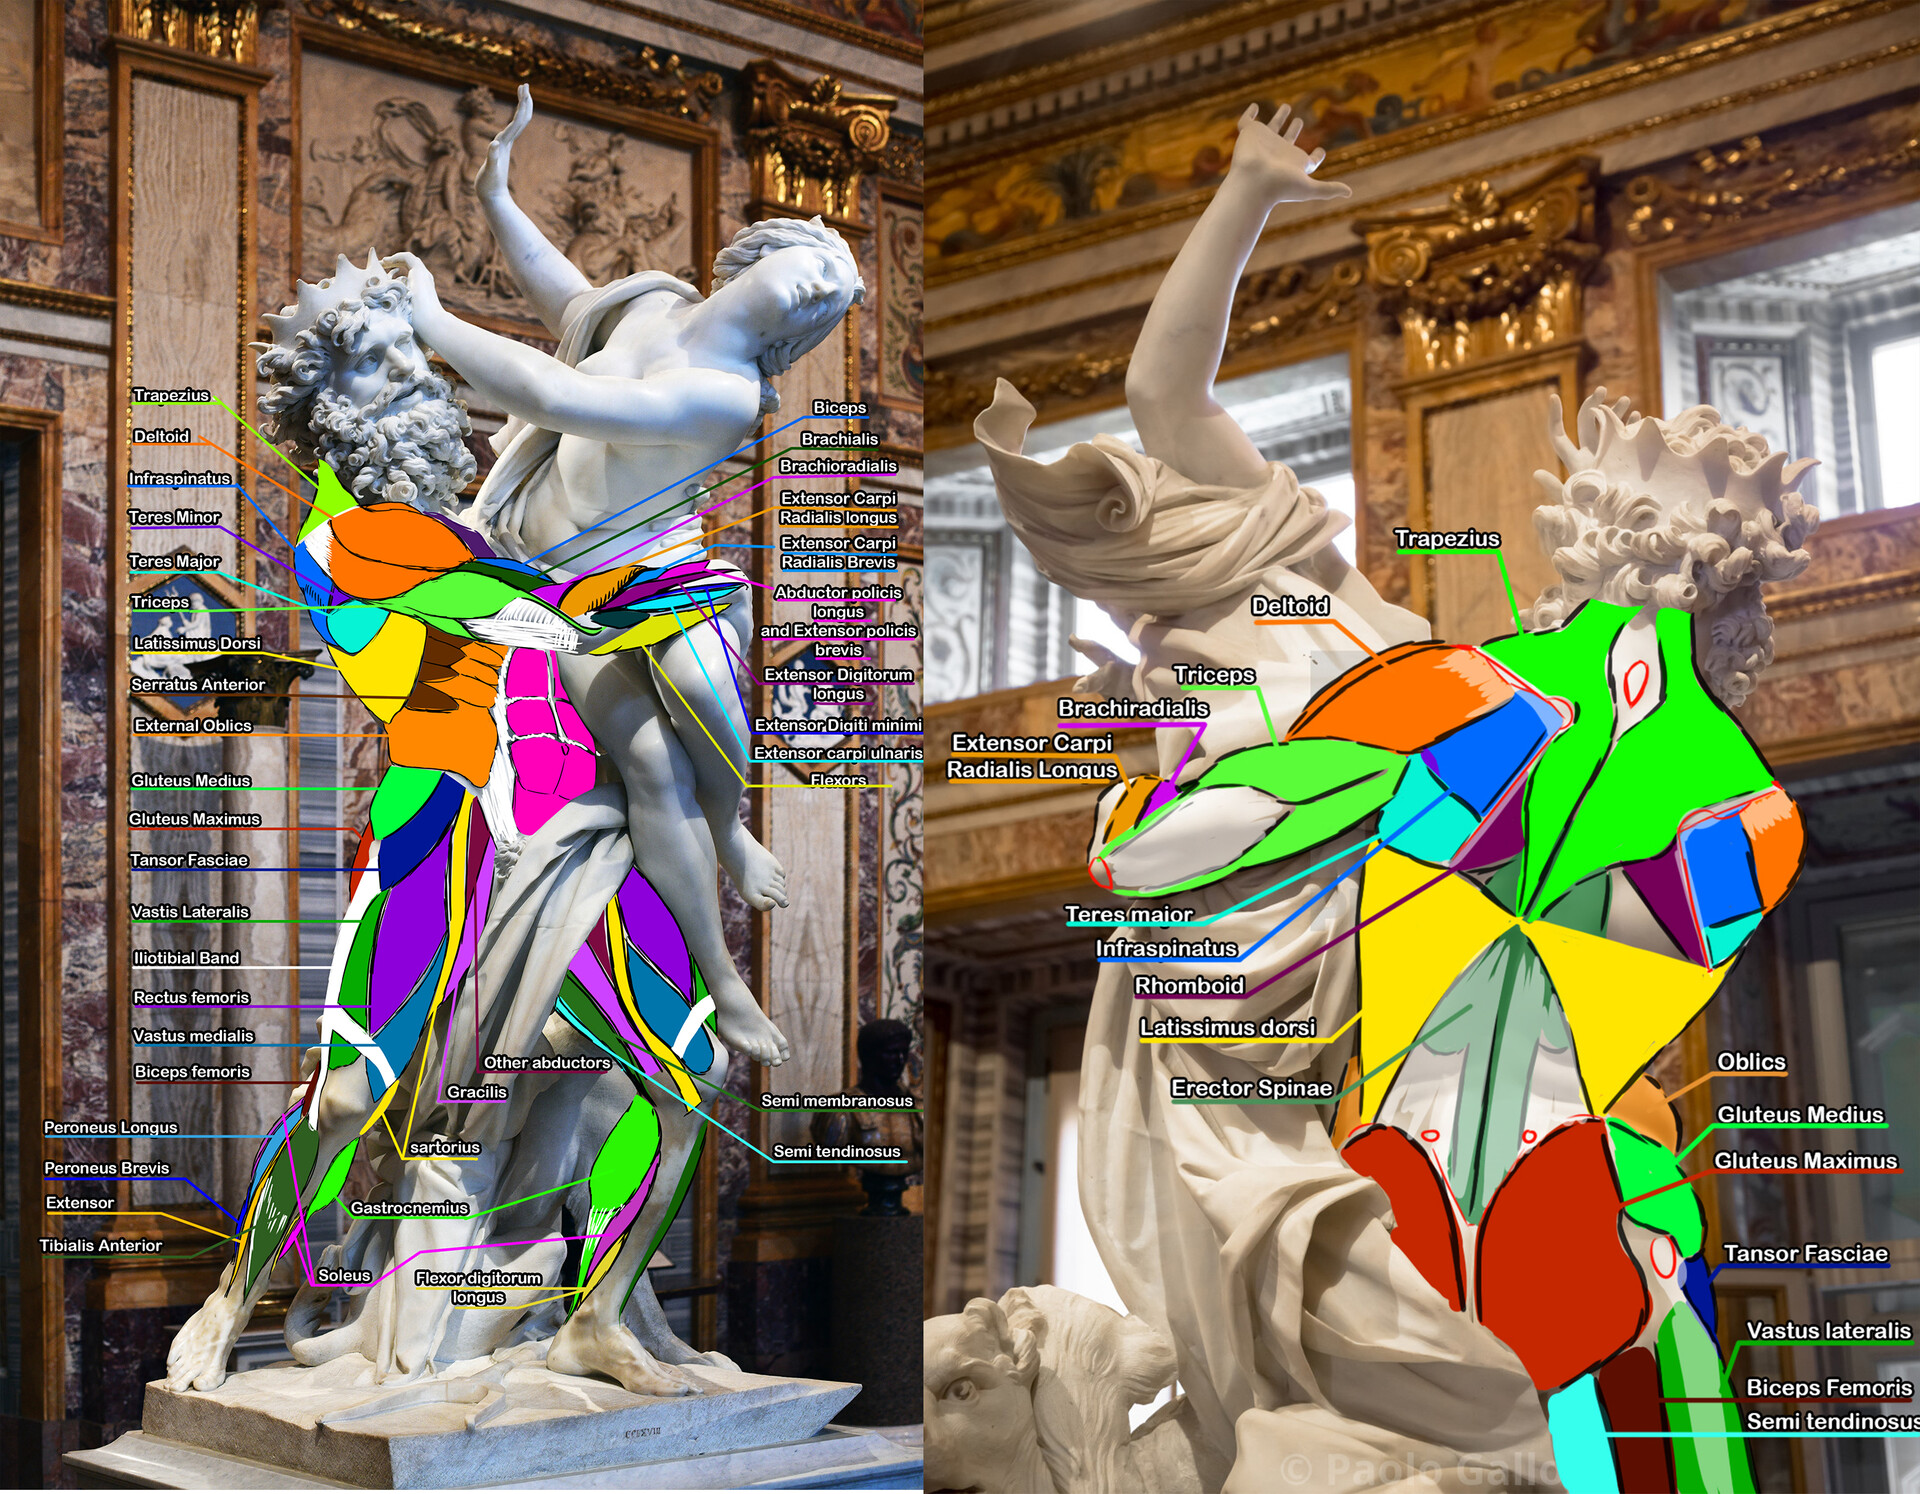
- I did an Analysis of the muscles if you see any mistake dont hesitate to tell me
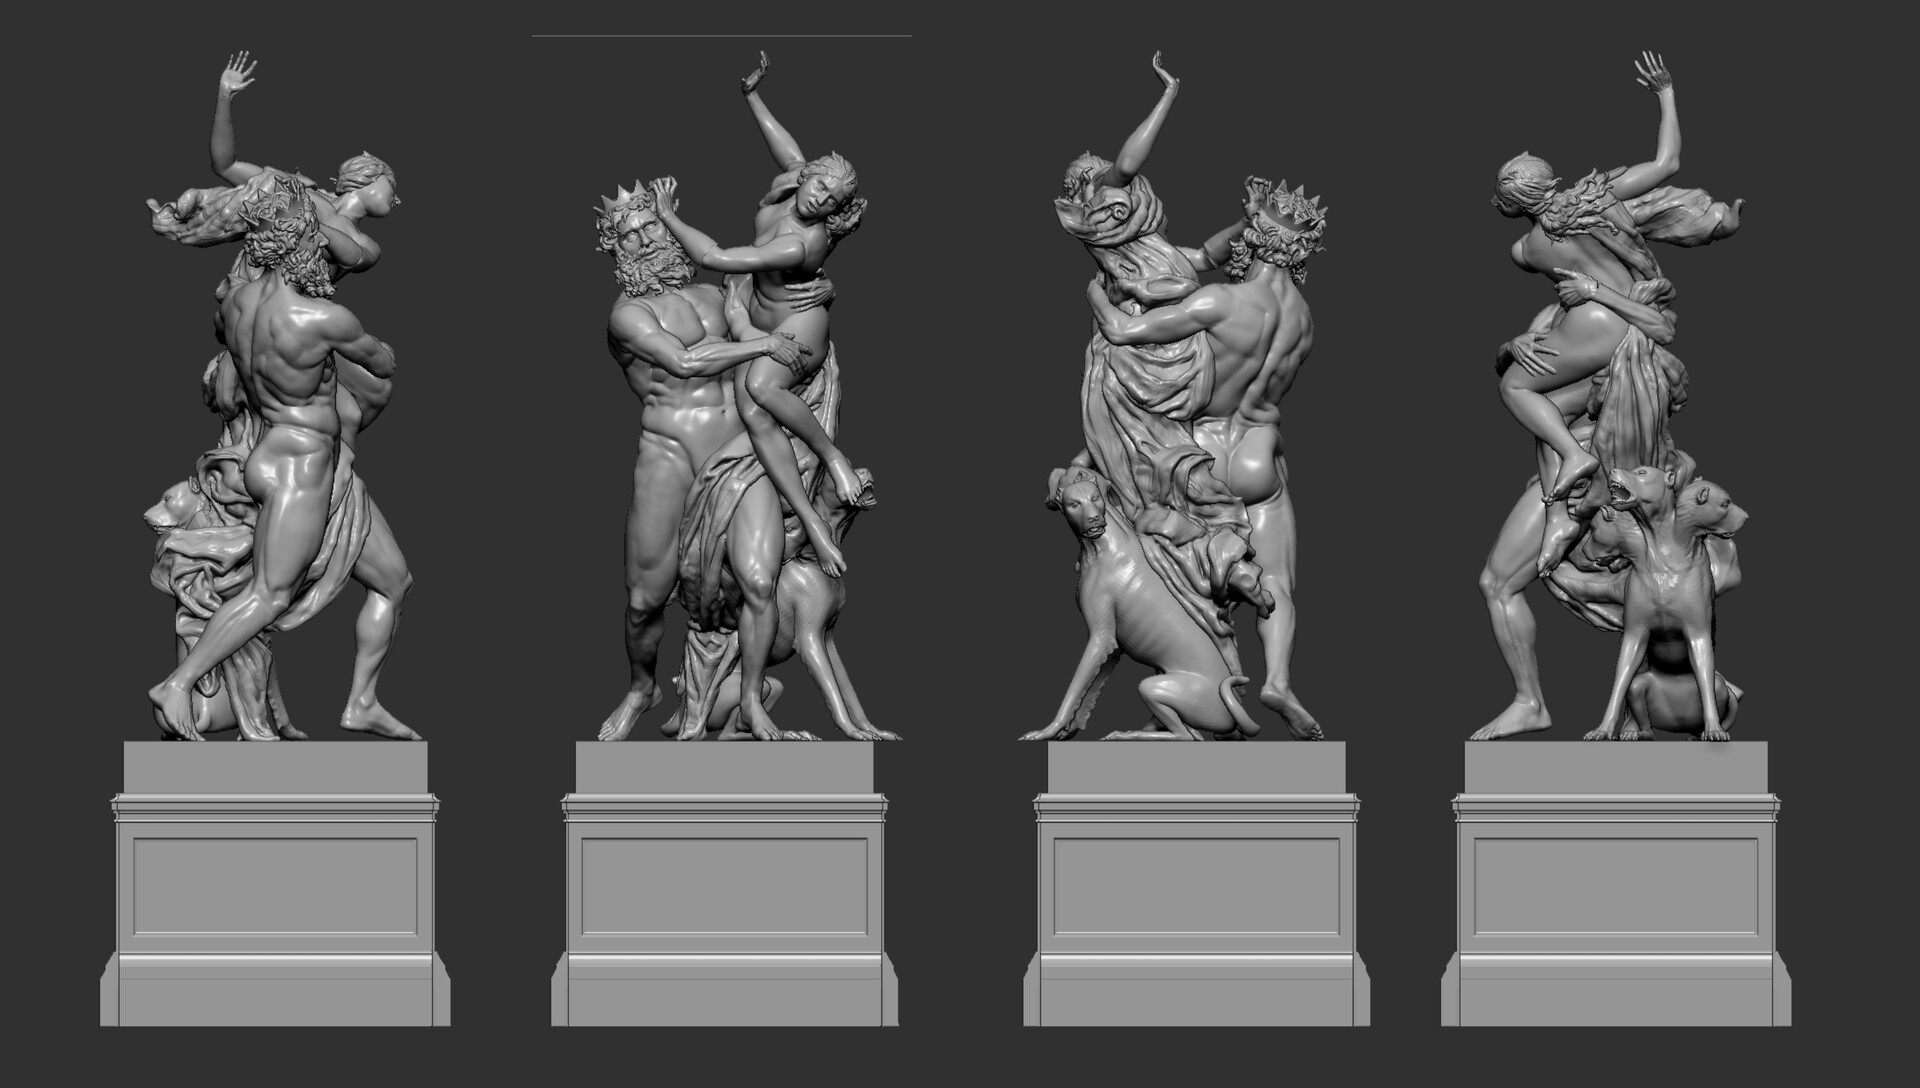
- Analysis of the shapes and angles ( red lines= angles of the man/ blue lines angle of the woman/ gree lines= linked angles between man and woman)

-Then I made a layout in Maya.
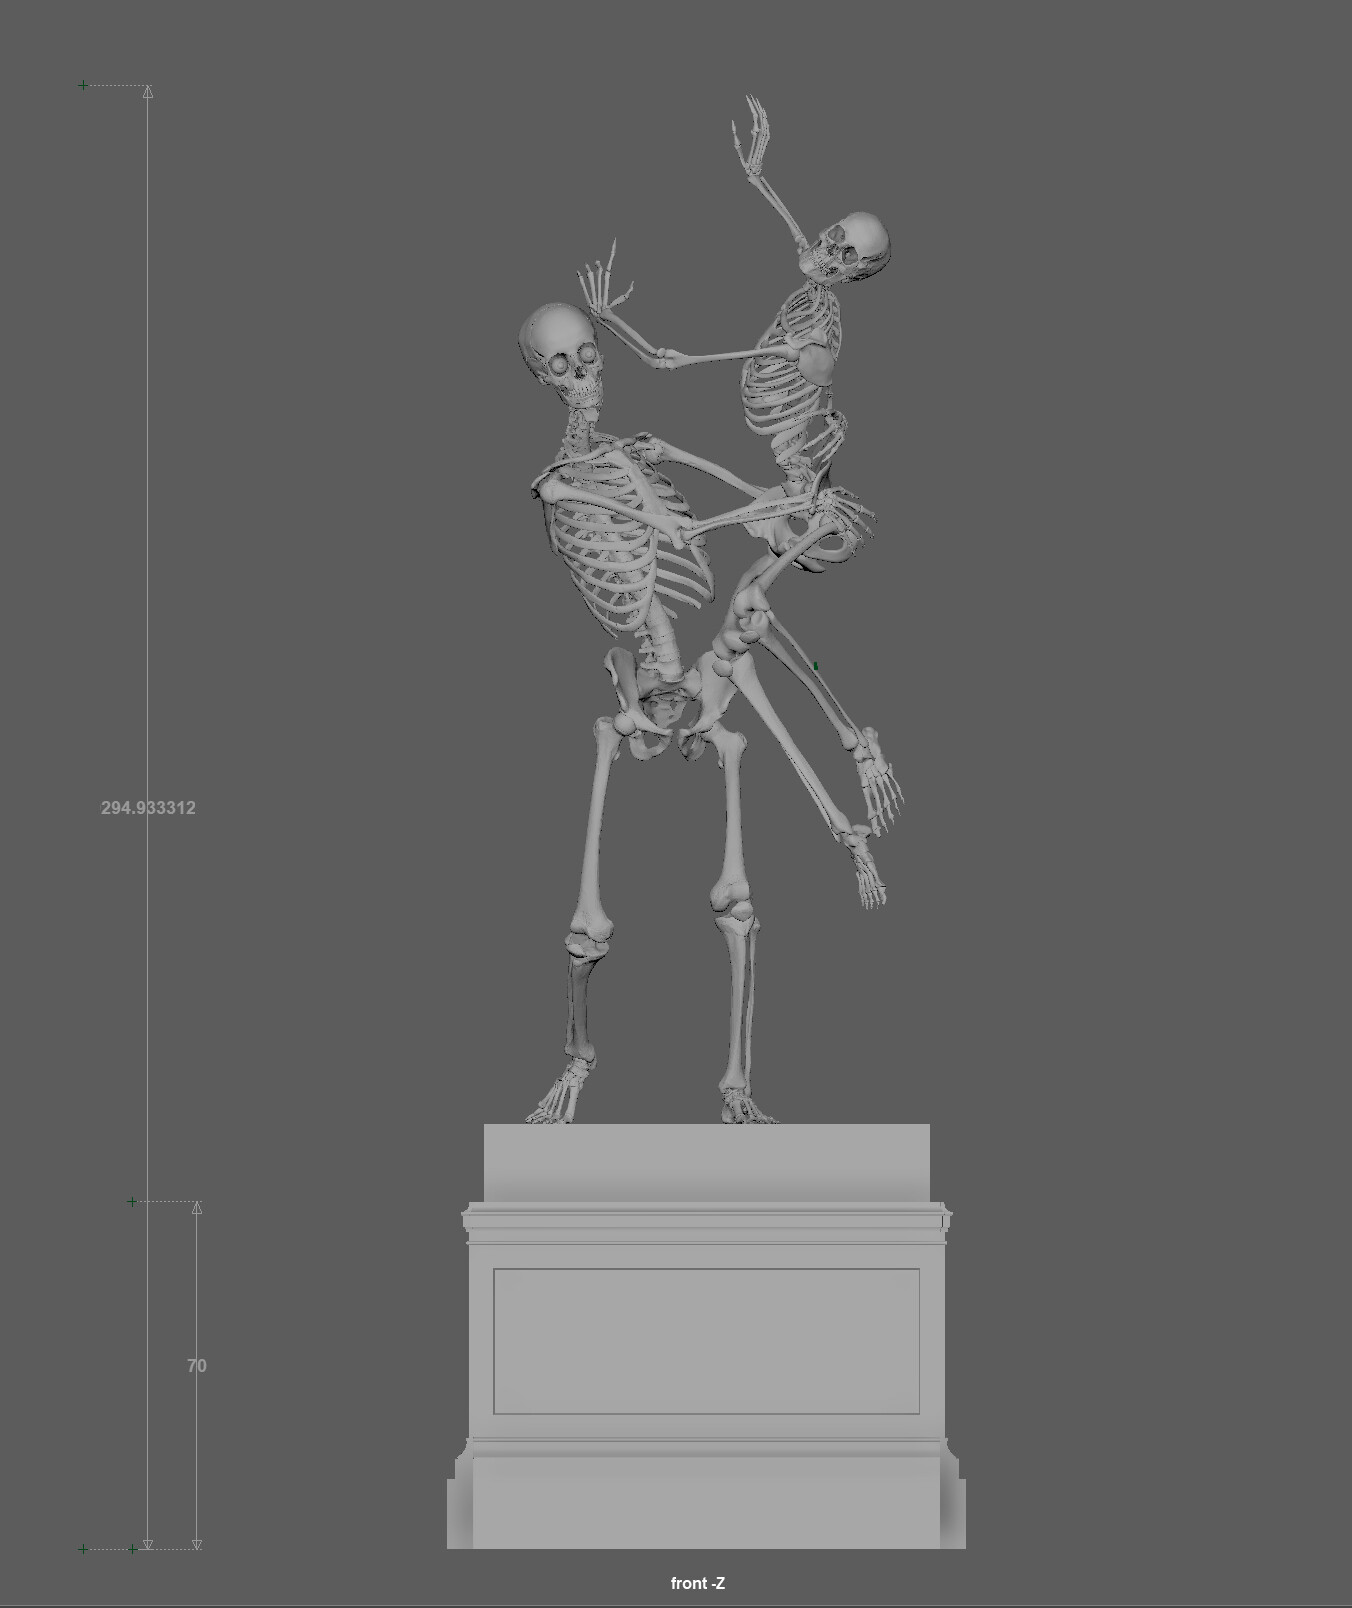
As I had to sculpt the characters already in pose and I won't be able to use the symetry in zbrush. I decided to put some skeletons as a guid to not mess up my proportions.
- Then I attacked the sculpt
- Rough sculpt
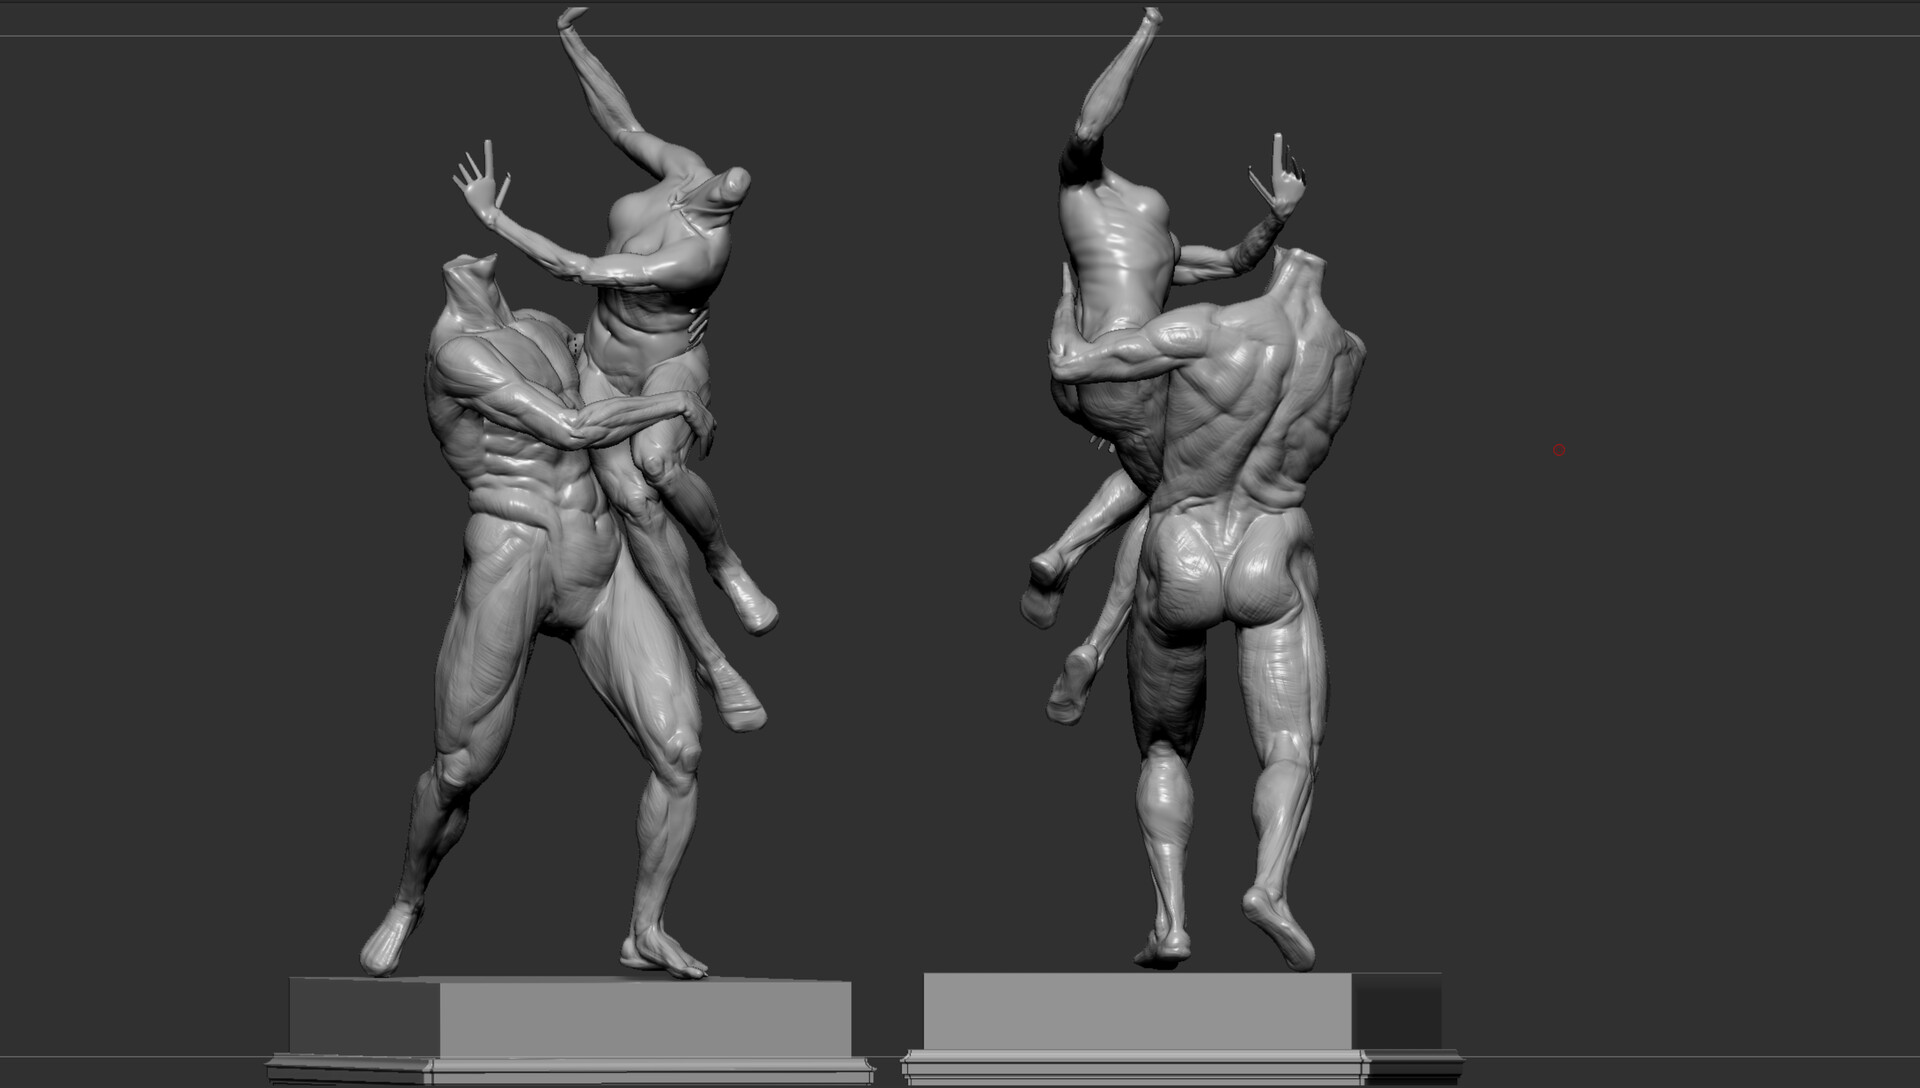
- The head is the only part I sculpted in symmetry in the center of the scene, then fused it to the rest of the body as everything is in dynamesh.

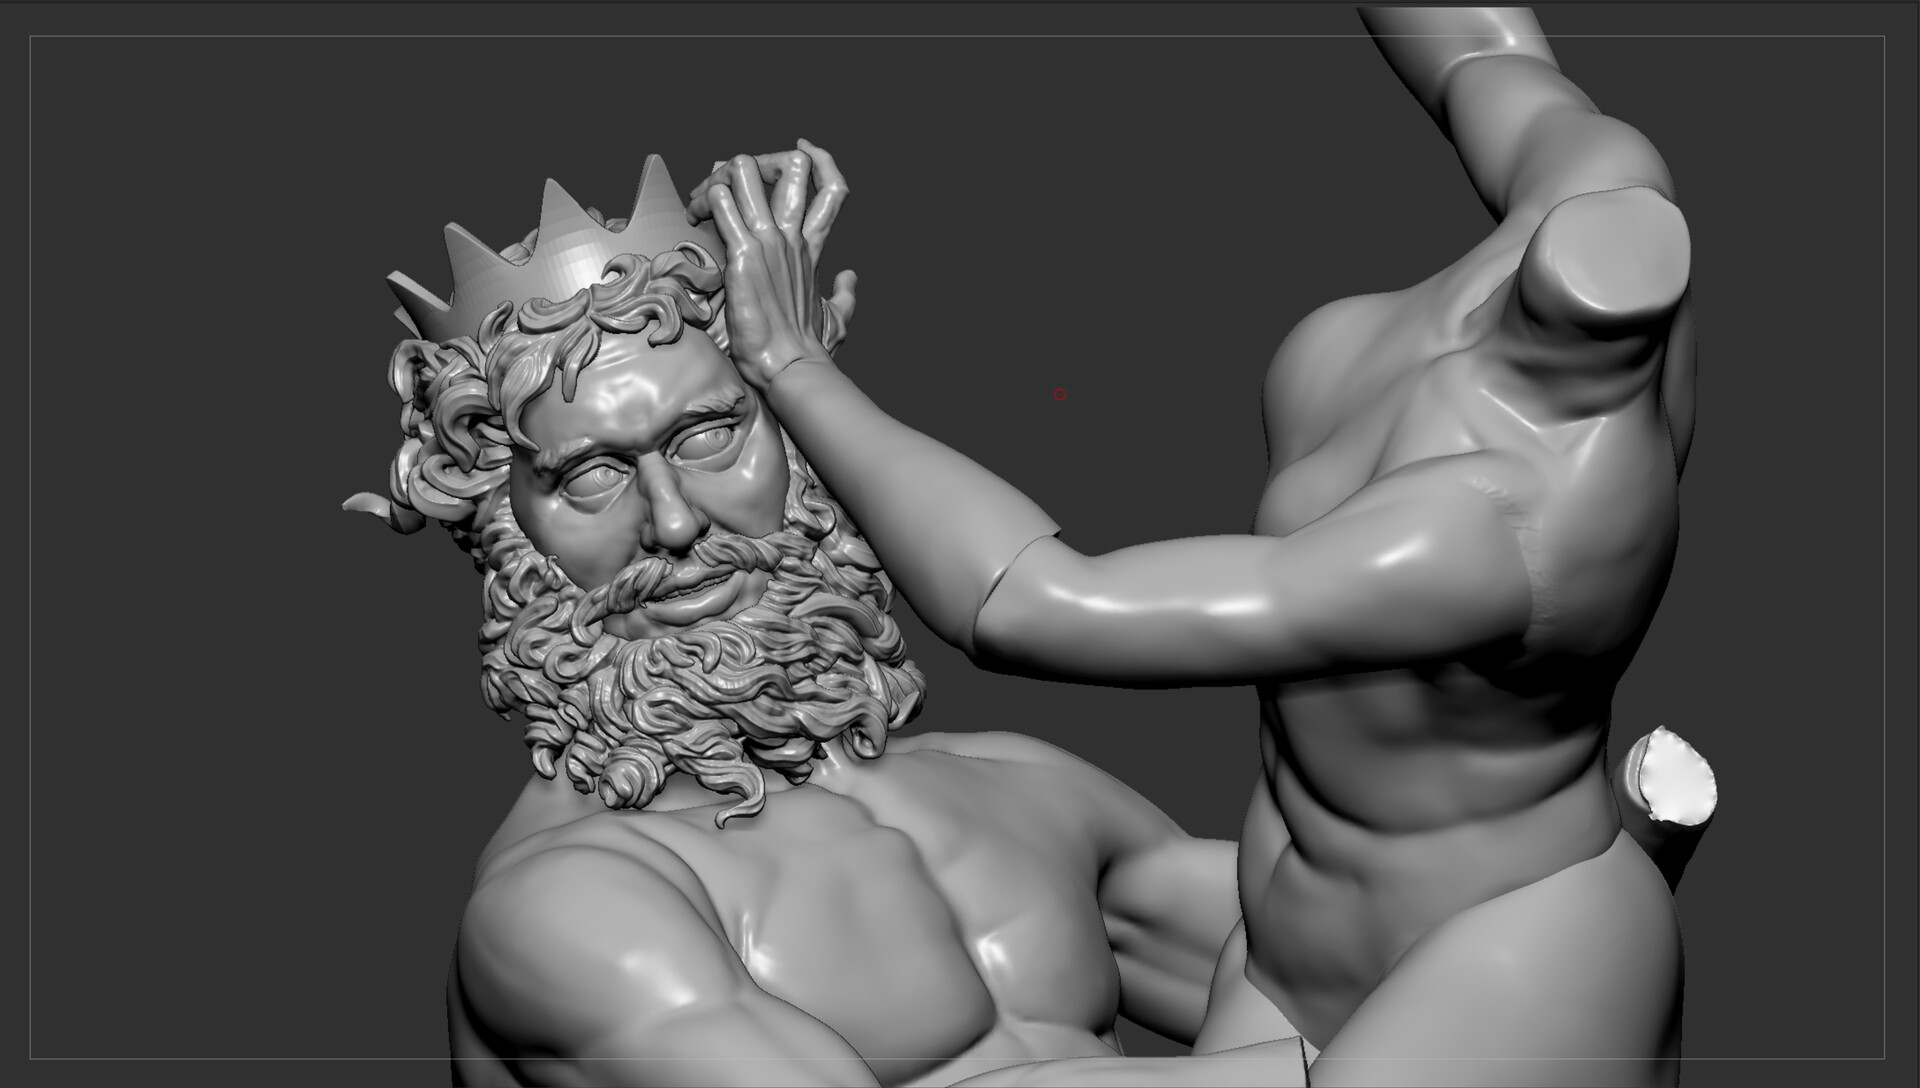
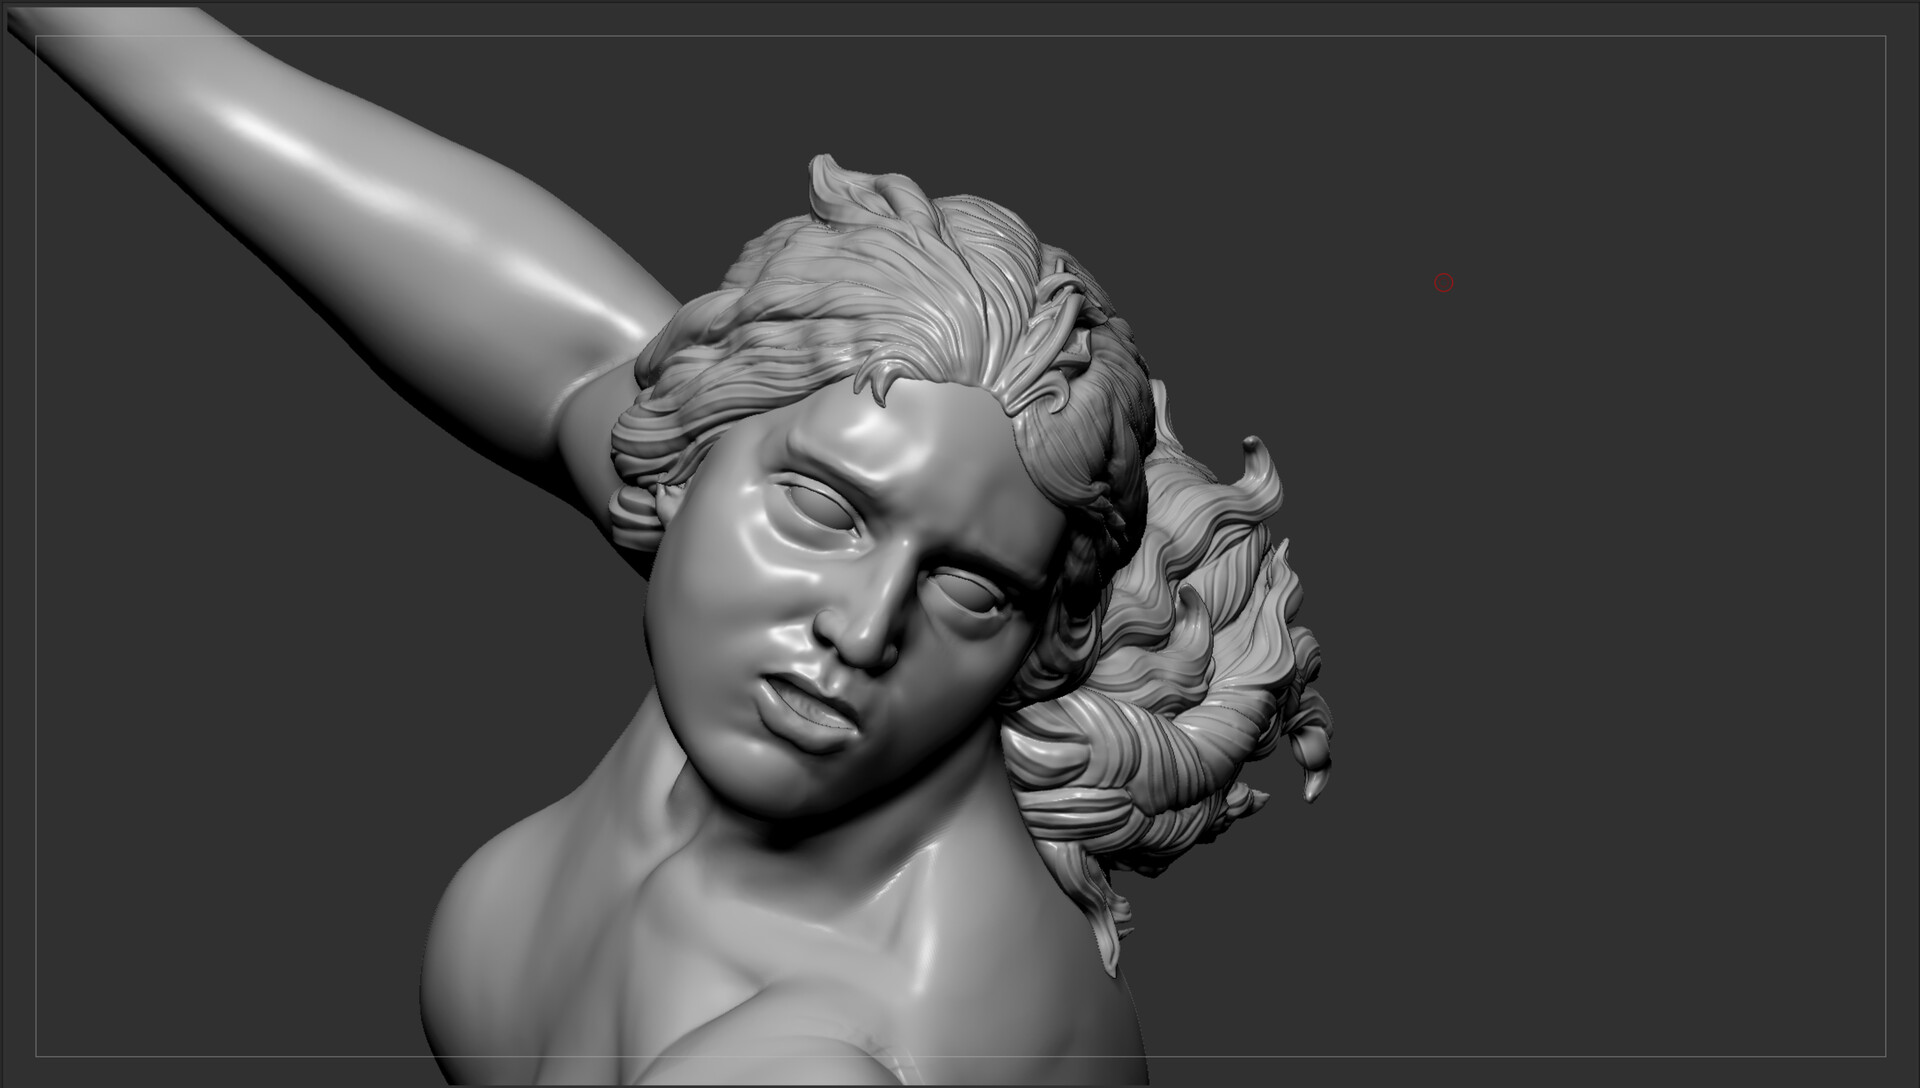
- For the hair it was just rough dynamesh + IMM and patience
- Same technic was applied to the woman, and at the same time im always changing some part of the bodies
 - The dog was done in symmetry started from the base mesh file already avalaible in zbrush and modified it. My goal was to copy the most accuratly the bernini statue, but I decided to make this dog a bit more agressive than the original.
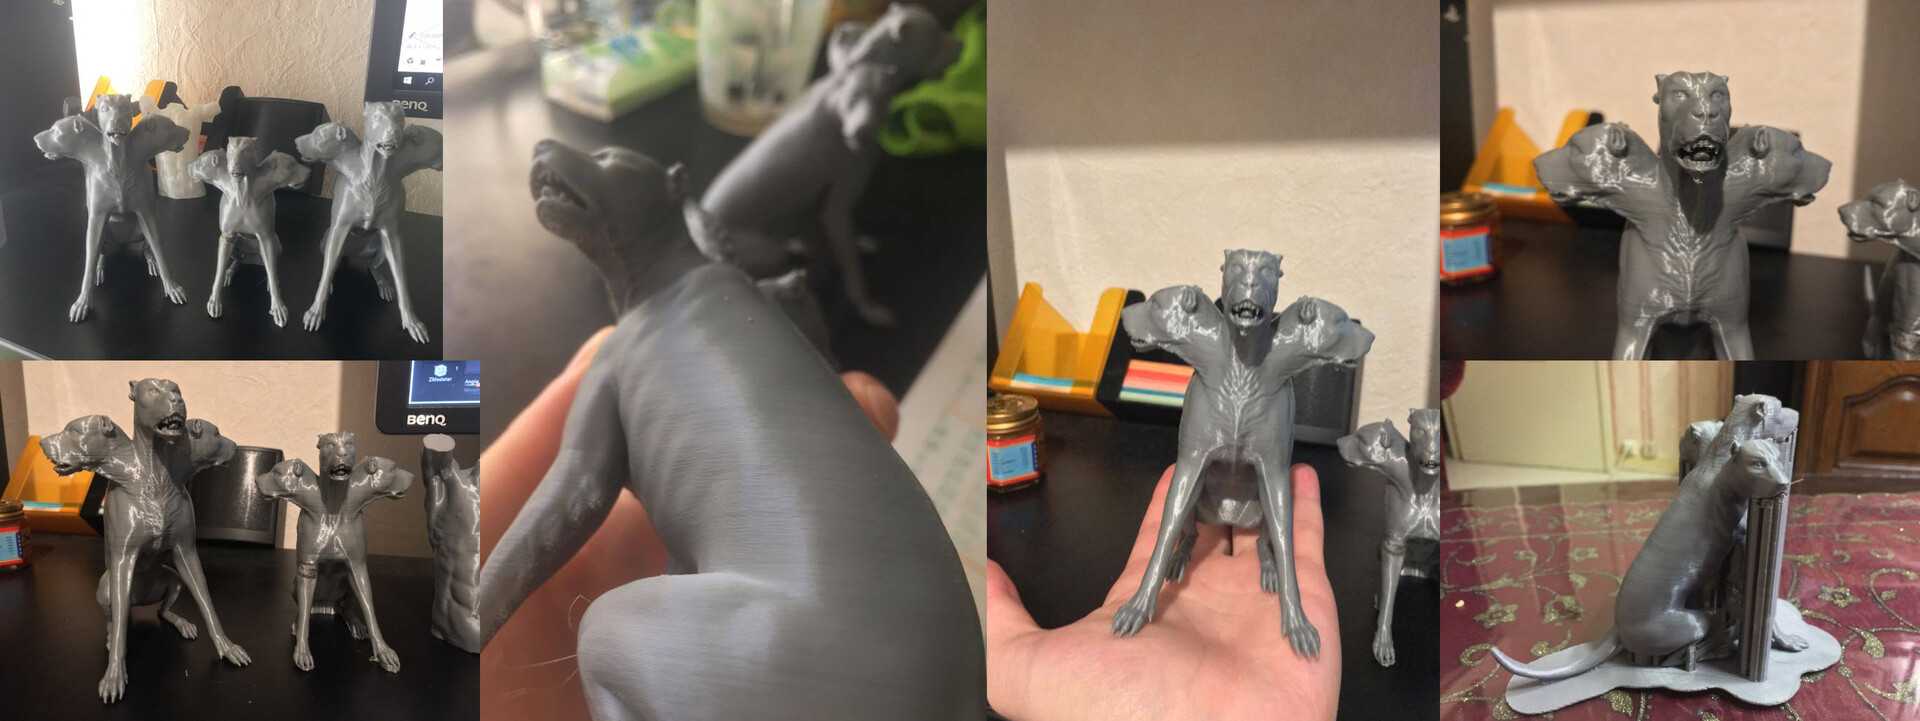
- Could already do some test of 3D printing with the dog: (by the way all the STLs you will see in this post will be available in my store.)
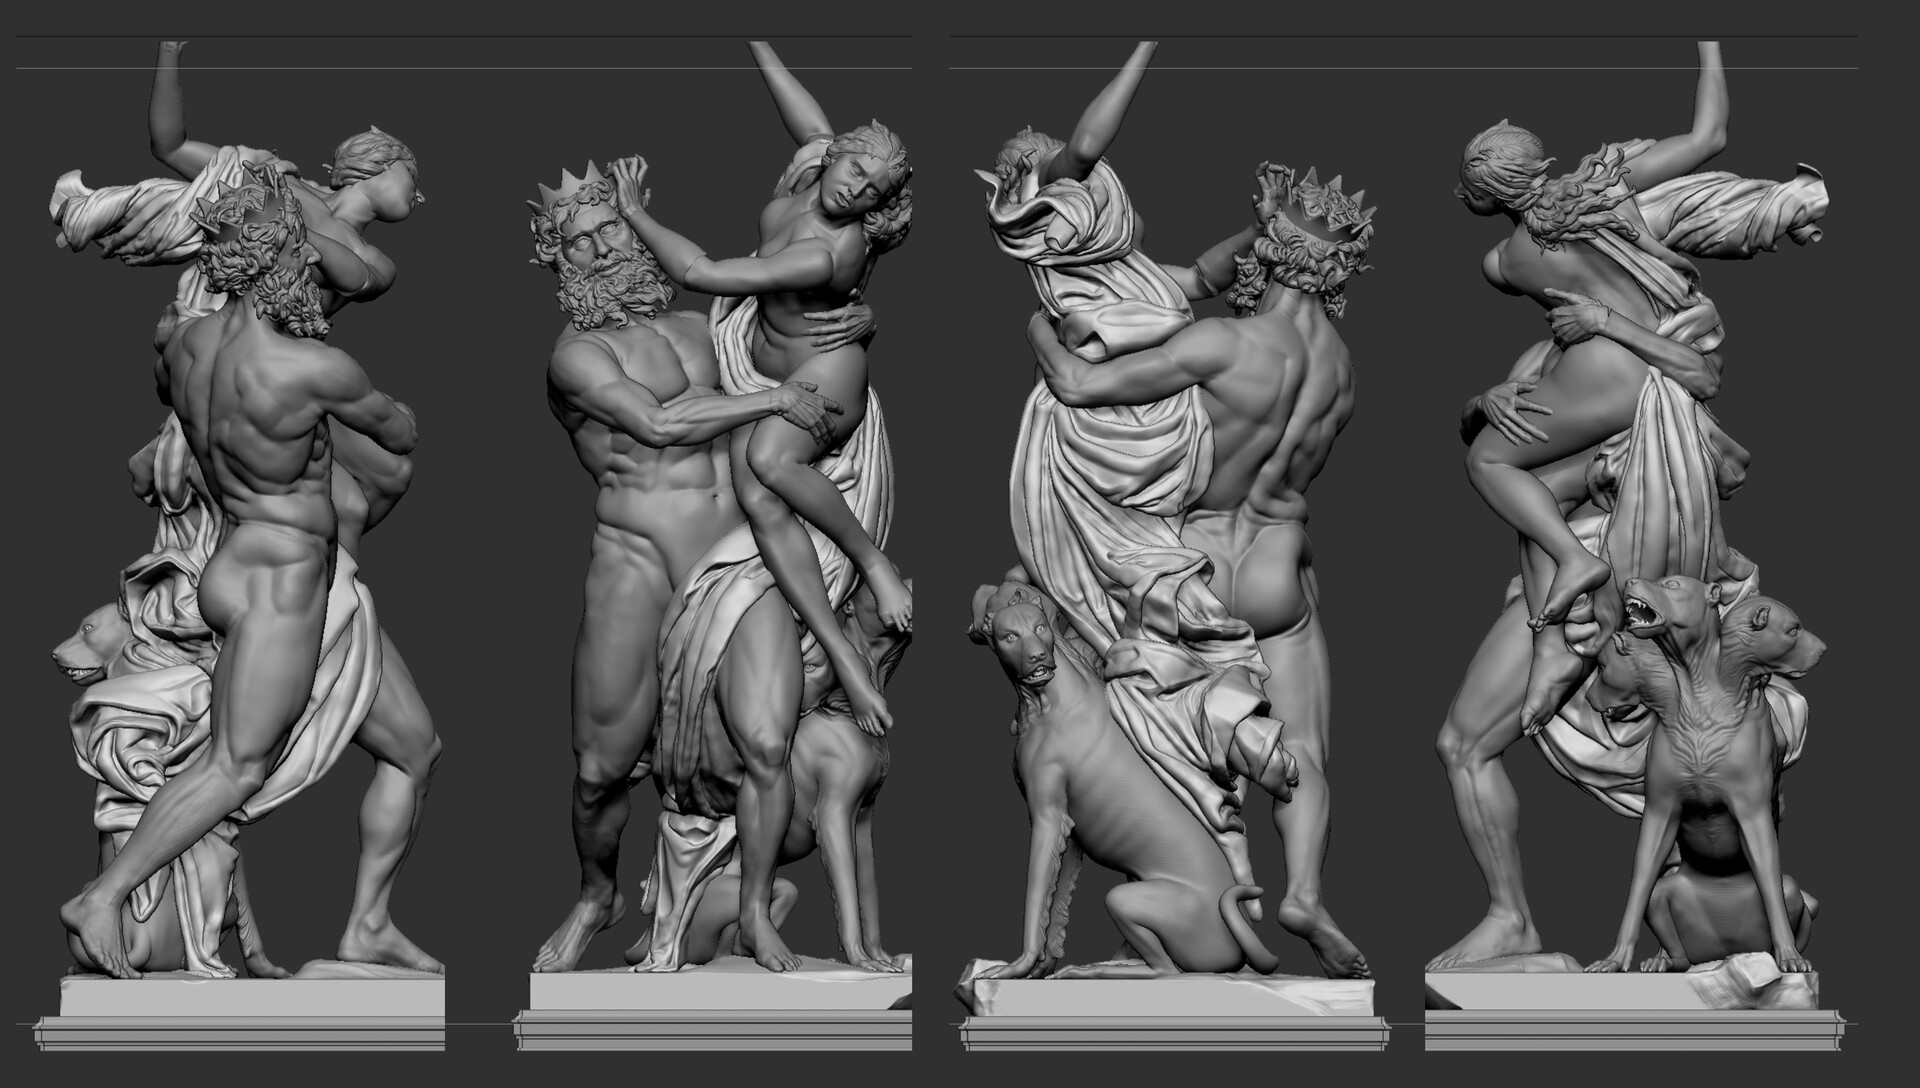
- Begining of cloth sculpt + dog in pose
- Refining cloth + pose of the dog (Yes the man still as some weak arms, he only did leg days)
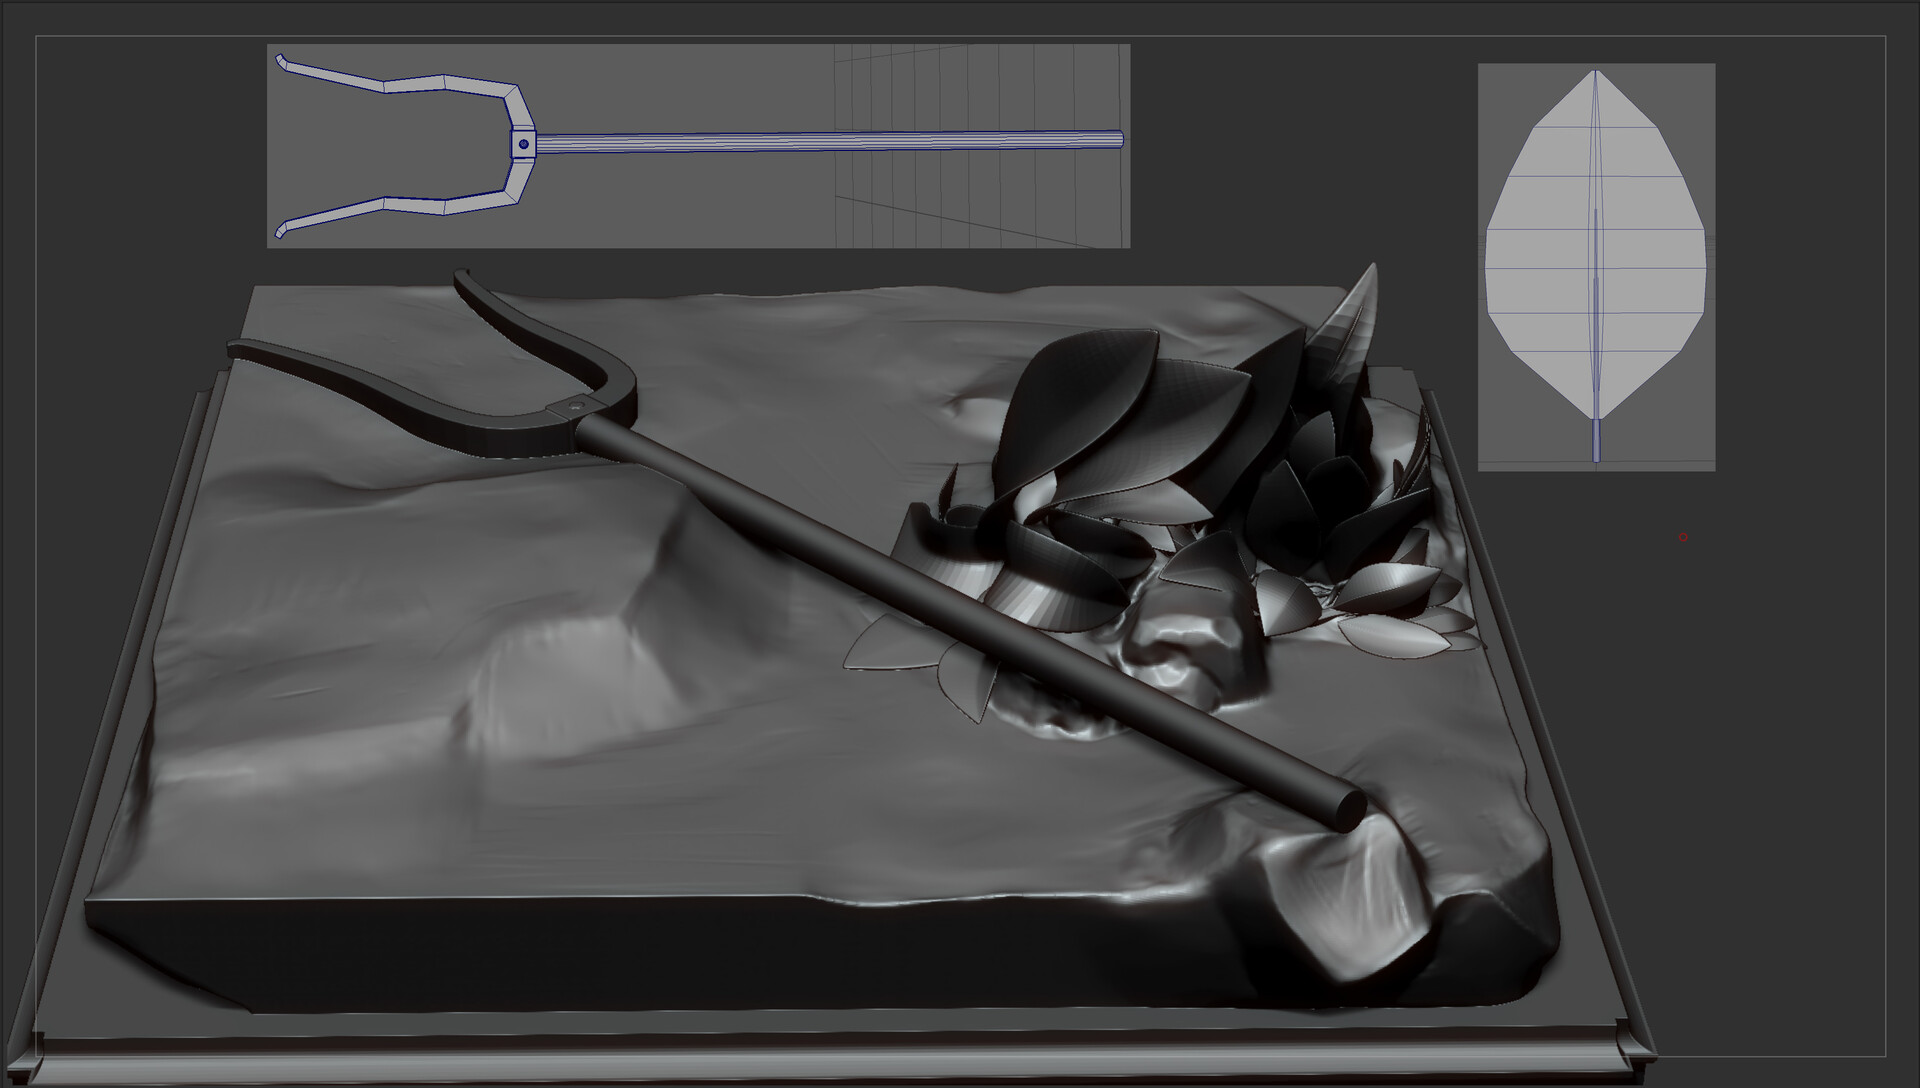
- Leaves done in low poly maya, and then used as IMM in zbrush and deformed
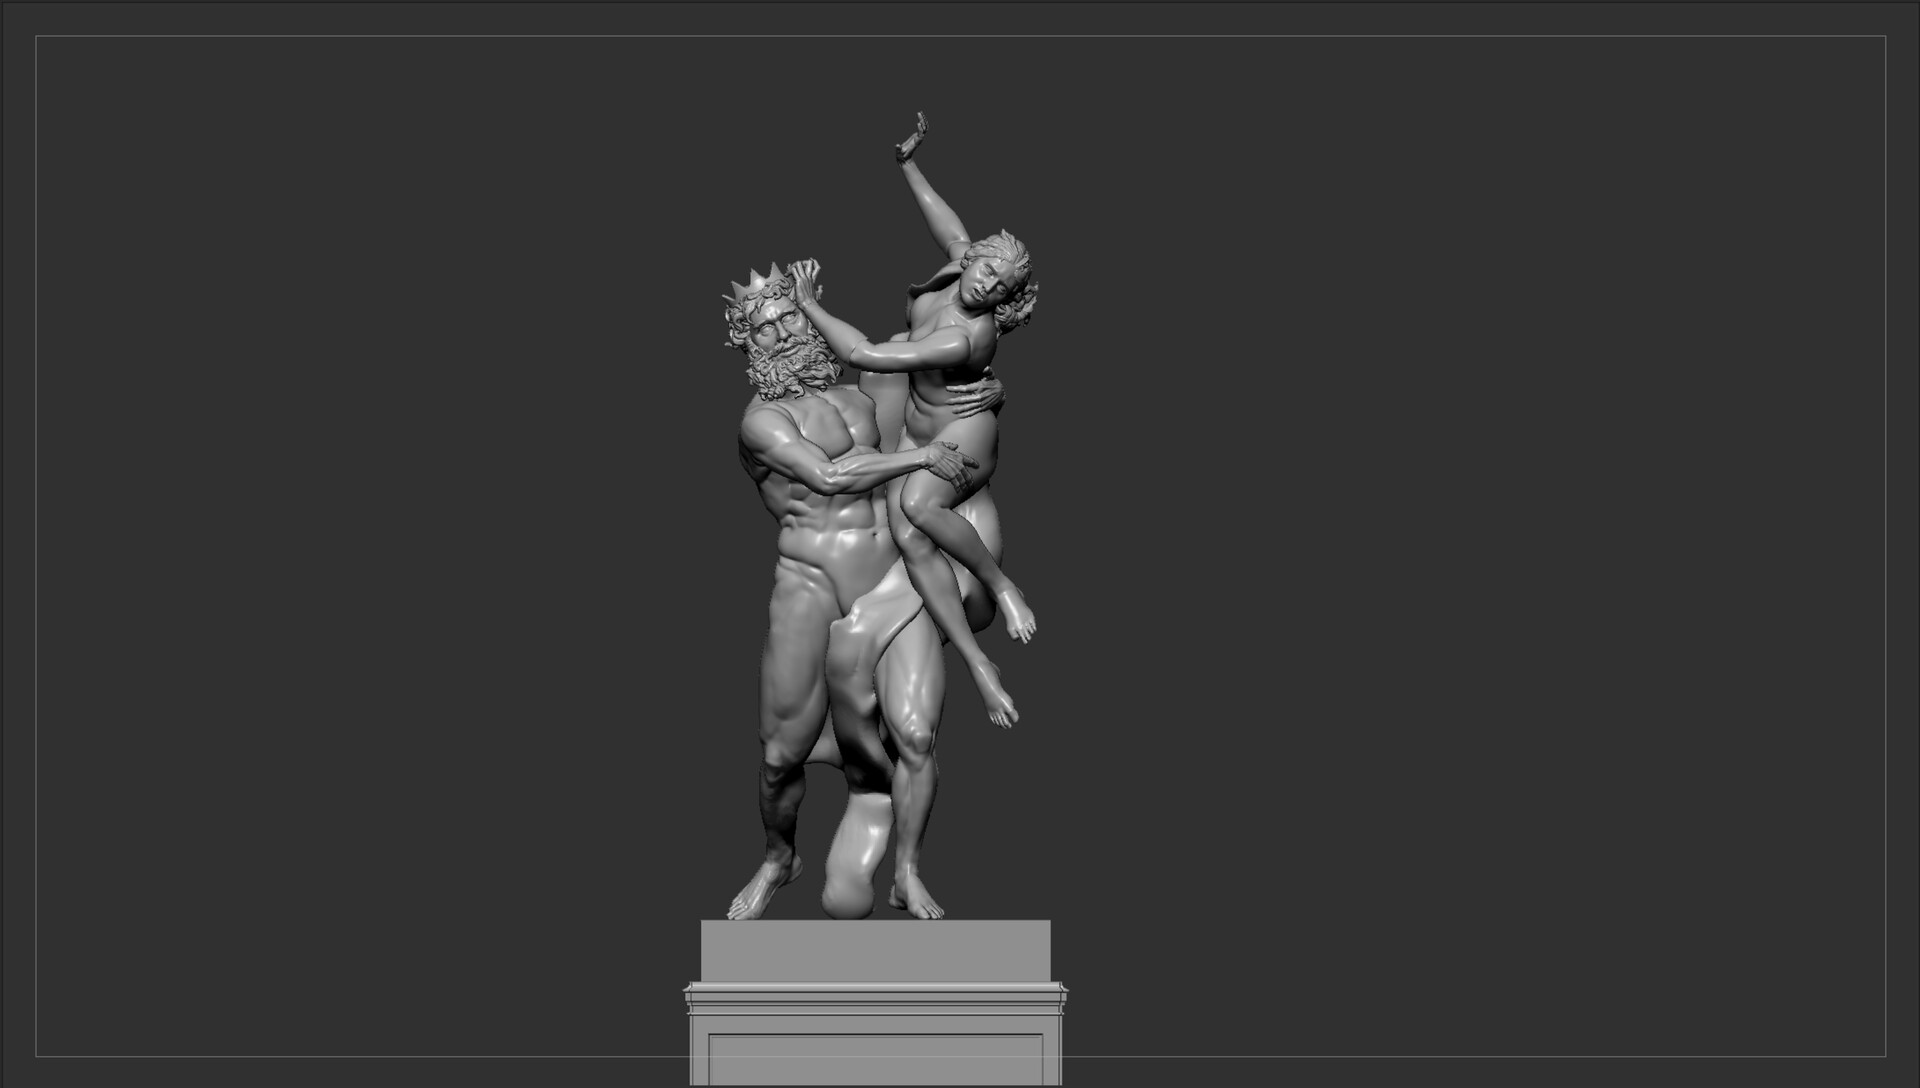
 - Refining everything
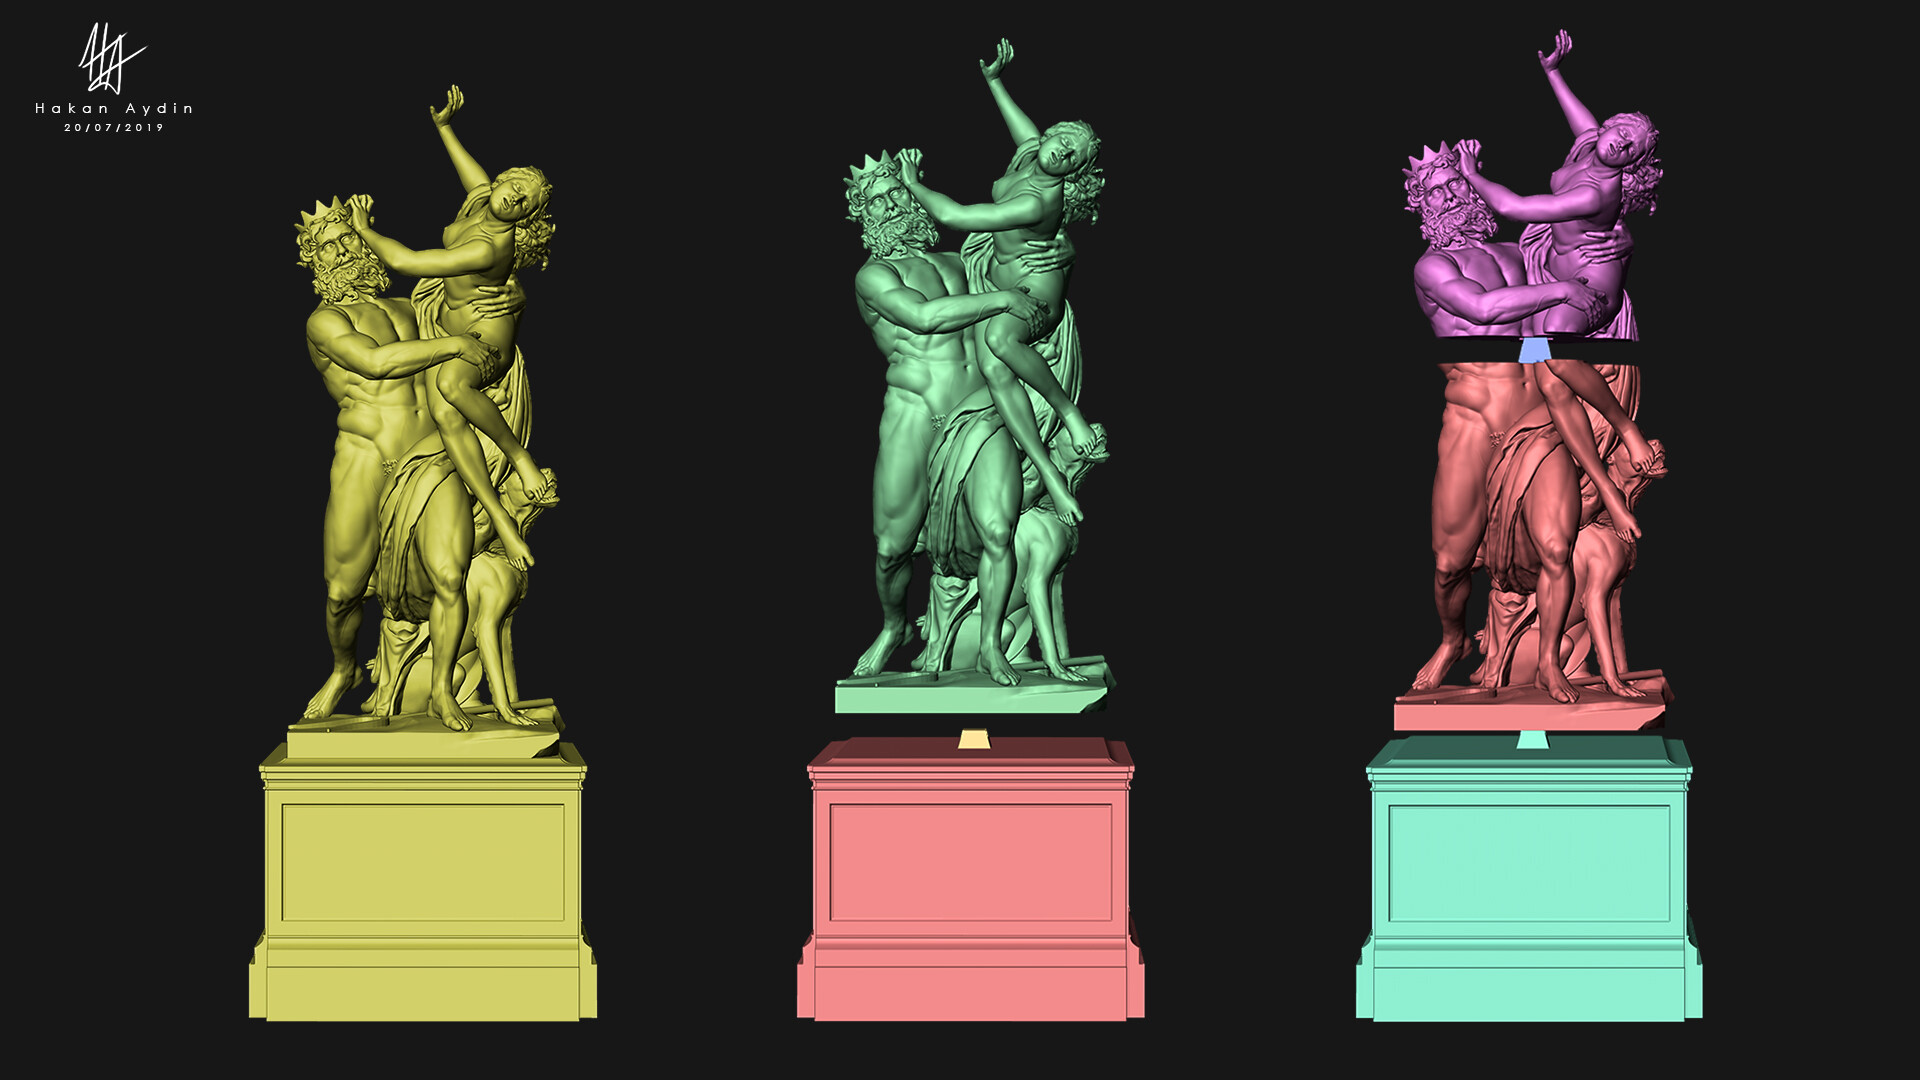
 - From there I decimate it and make few renders in arnold without uv or texture, just a simple clay color.
 - I prepared this version where everything is separated for people who want to print it in really big. But I didn't have the courage to try it
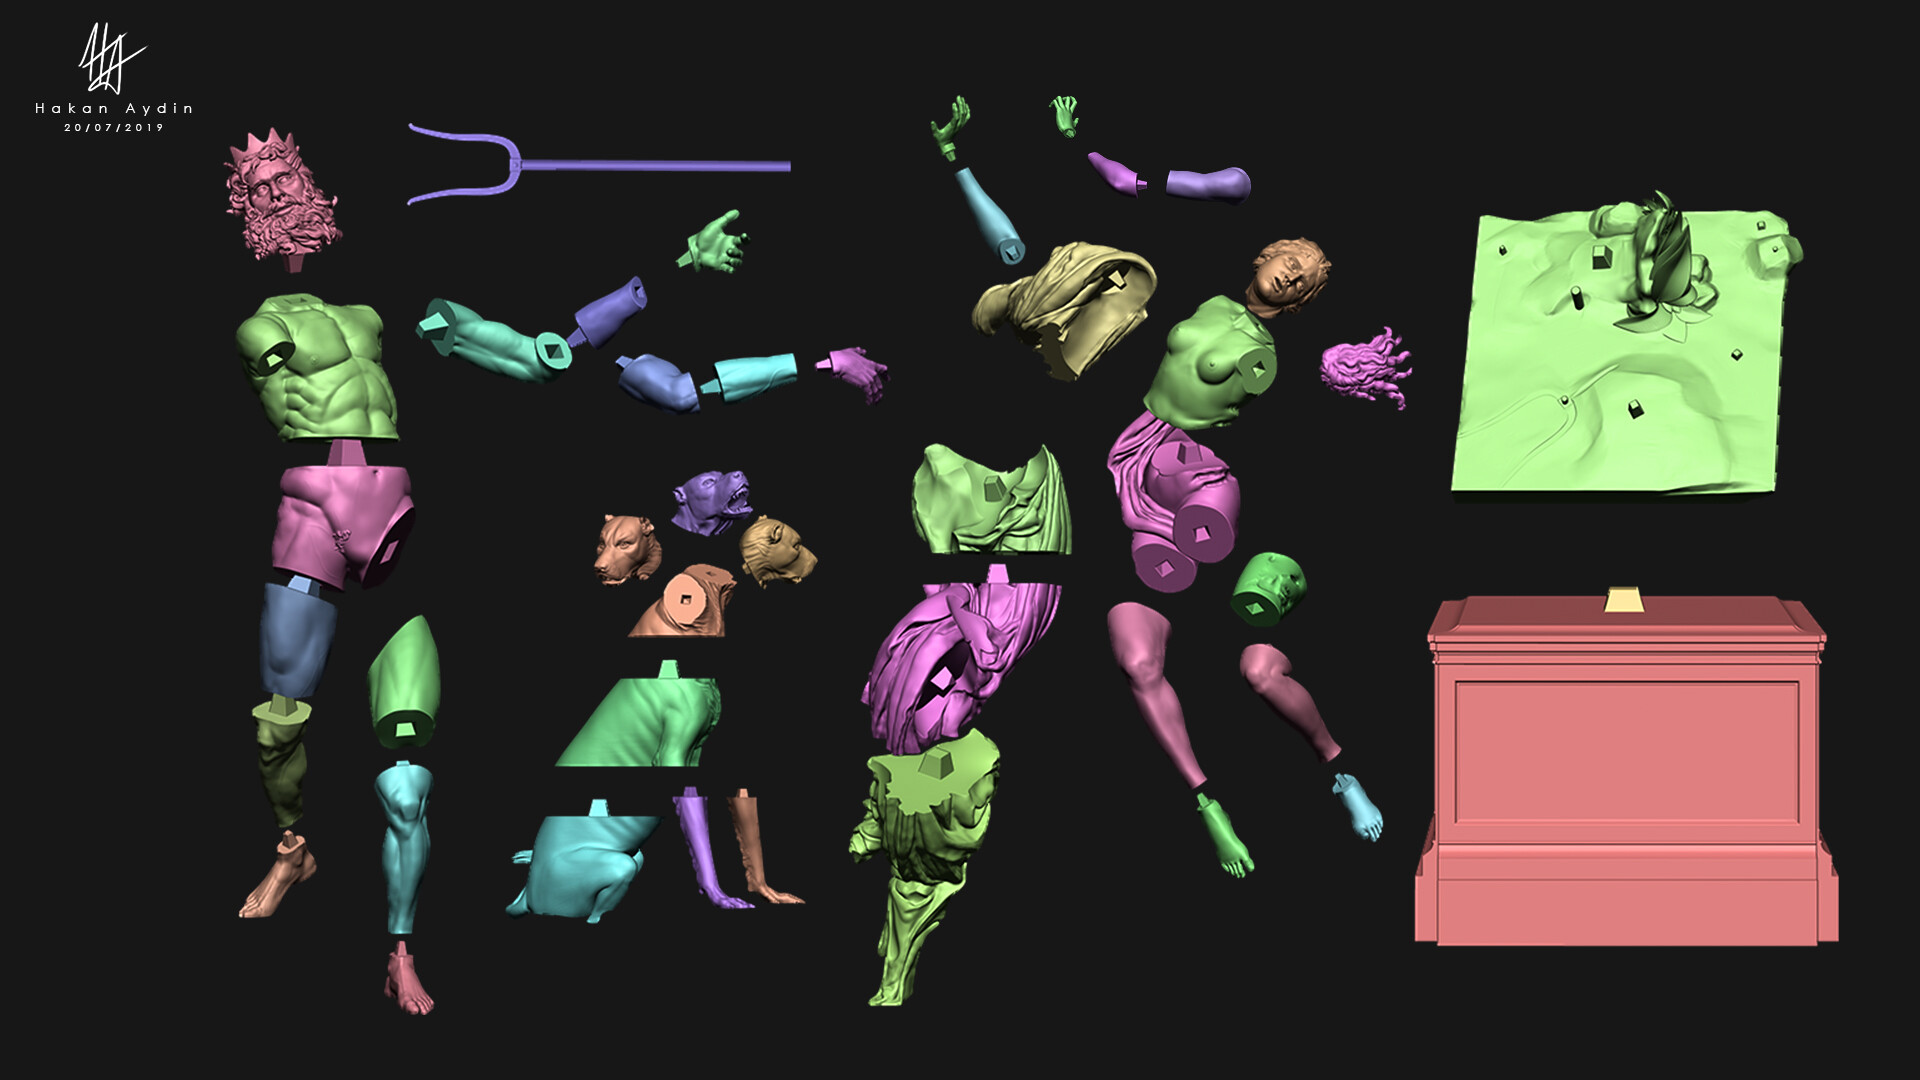
- Test on a small version around 10-15cm already good looking on a filament print cr10s pro and im a noob in 3D printing
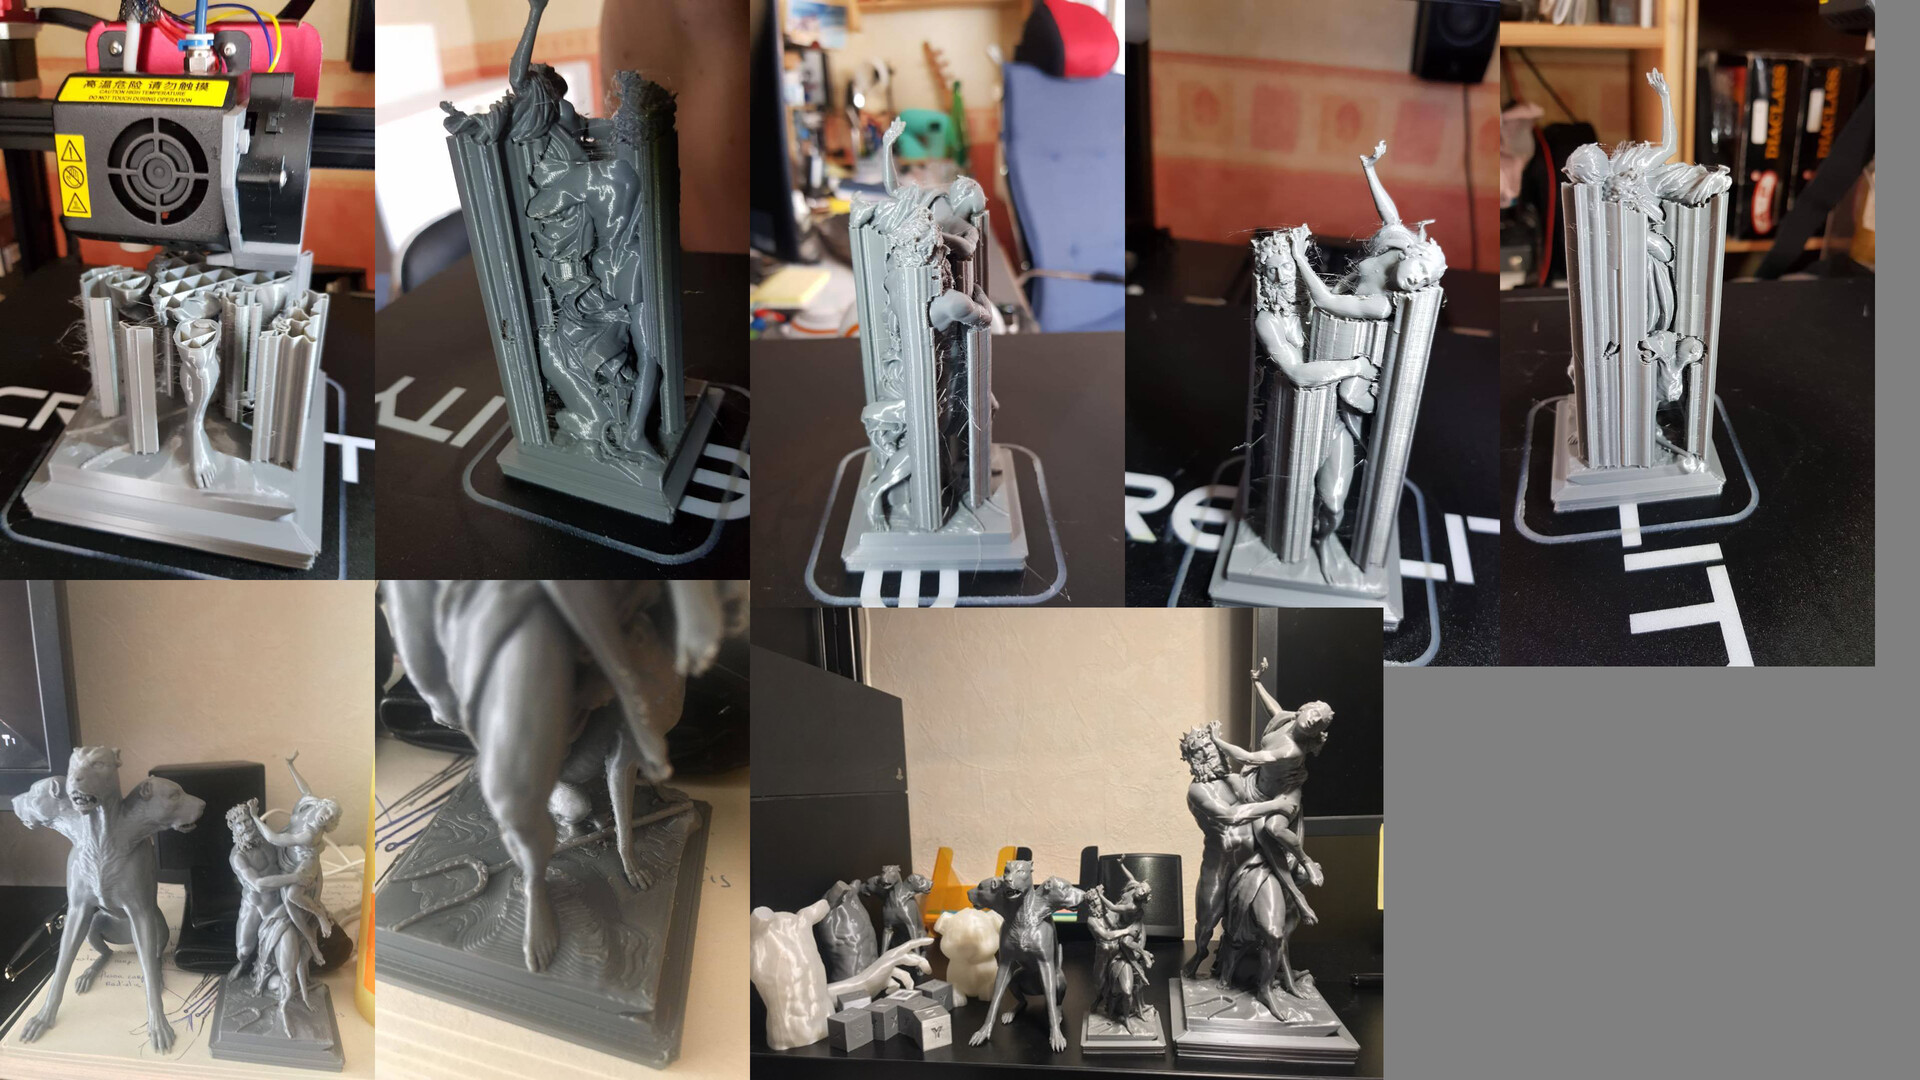
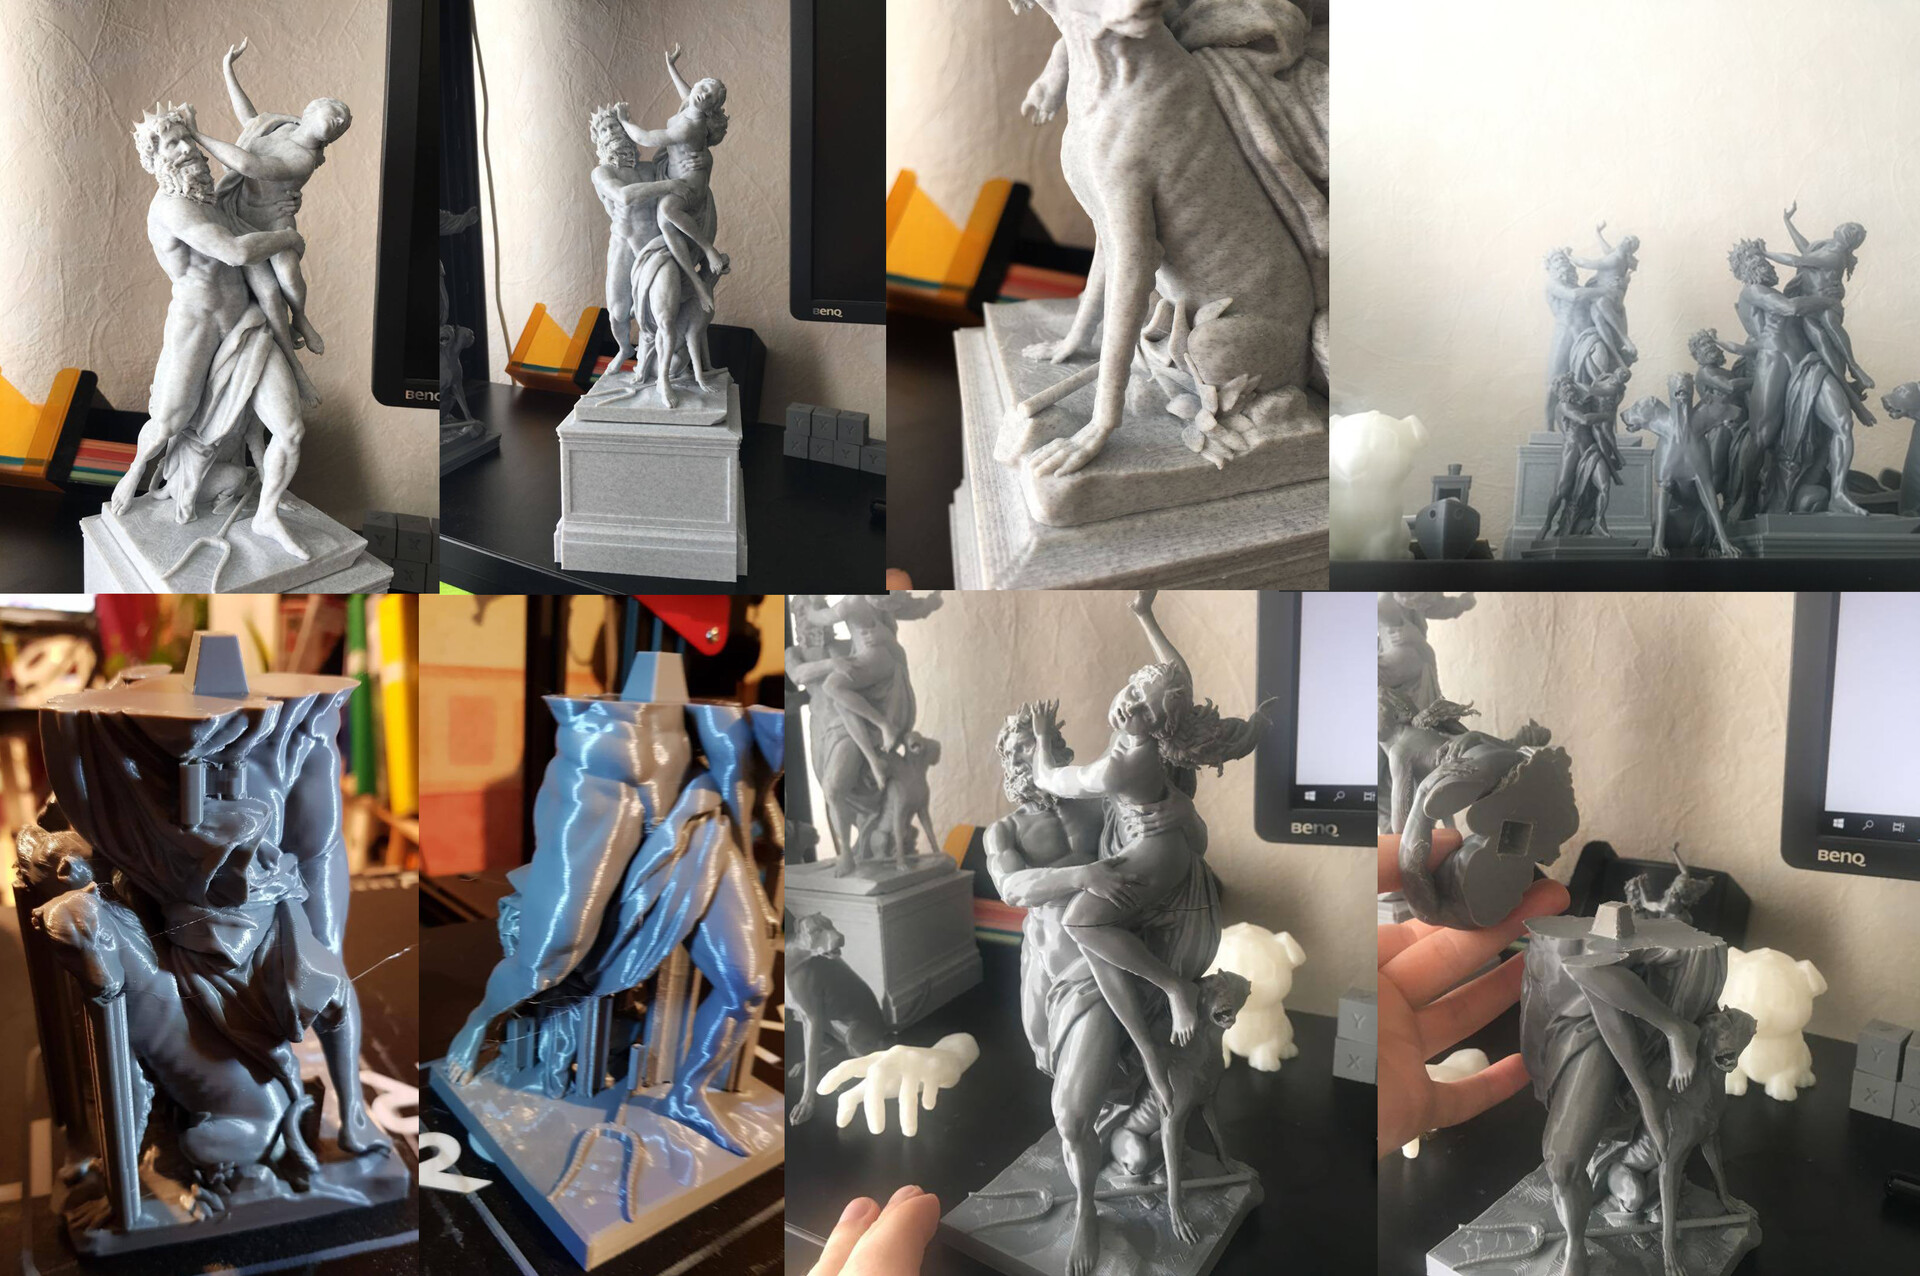
- Then 1/10 scale print size test, around 30cm with the stand and 23cm without the stand. No retouching, only removing supports and looking really like the zbrush model. Can't imagine if it was done with resin printers. Starting to have an army of Cerbere and Hades ^^'
- I should have finished there, but I decided to push it a little more and make a marmoset viewer out of it.
First I had to retopologize it and reproject details. I did quick retopo with zremesh and zremesh guides but had too many issues with it. To counter this I decided to use the polygroupIt tool and then zremesh following the polygroups. worked perfectly for the woman. For the Man I was not happy with it and decided to do it by hand on Maya with the quad draw tool.
-I Reached 130k Poly in total, only quads. Don't know if its good, but that's the best I could do

- From There I had to do the UV's, I decided to try Rizom UV for this step, was really cool and fast to learn this software, By the way if maya could fix their problem of unfold 3D process error with amd processors it would be nice -_-
- Then I did the baking of the maps with Marmoset ( Normal, Normalobject, Occlusion, Curve, Height, Id, Cavity, Thikness, Worldposition, )
- Learned quickly the basics of substance designer on the substance academy, and prepared my materials.
- Learned quickly substance painter on the substance academy and painted the statue.
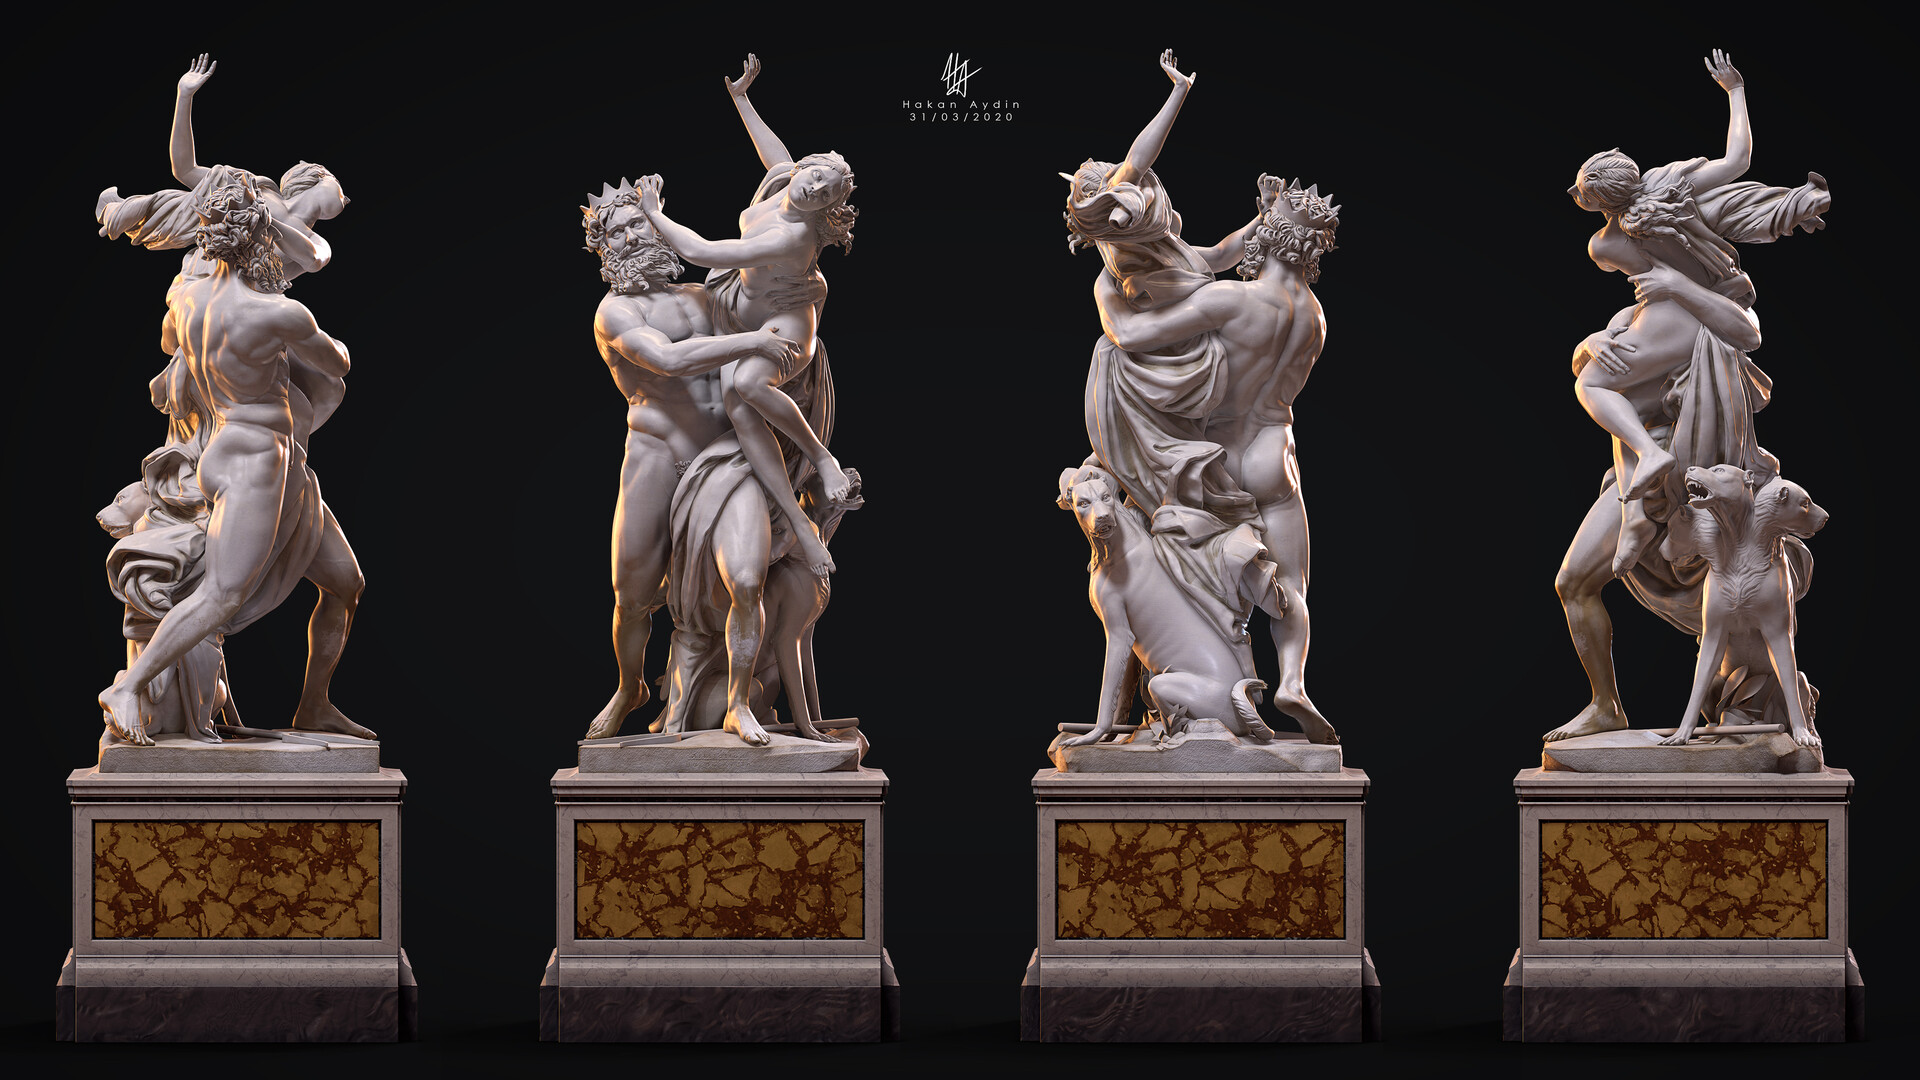
- Gathered everything in marmoset, made the realtime viewer, and the final illustrations .
- I go fast on these last parts as it is already a long post. ( Maybe in an other post, if you are interested tell me)
- Hope you like it, there was no secret tool or technic in this project, just patience. By seeing it now after days and with fresh eyes I know there are a lot of parts where I can do better but I have to leave it and will do better on the next projects. Mega respect to Bernini to have done this on Marble without Ctrl+Z and it will always be better than all the attempt of copying it.